Welcome, Edna! My new (to me) Burchard Weavers loom
I acquired a new loom this weekend. She's a 4-shaft counterbalance loom made by Burchard Weavers in Oakland. A Bay Area local!
Burchard Weavers plaque on wood
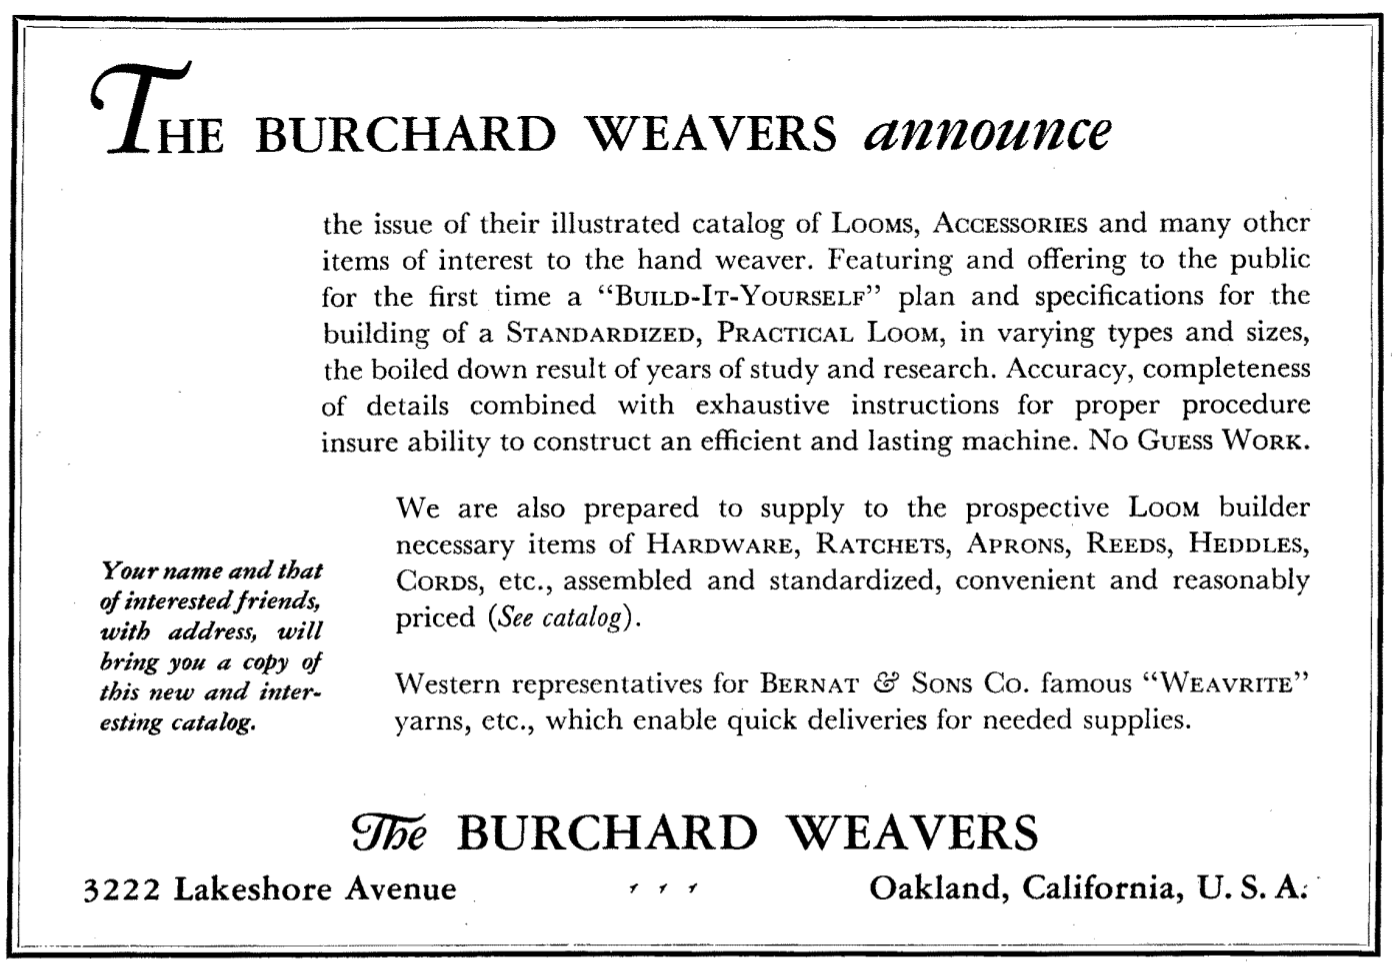
There isn't much information on Google about Burchard Weavers, but the previous owner found this ad from The Handcrafter Magazine (1933).
I also sent emails to various guilds and libraries/archives to find out more. I plan to write up a post about Burchard Weavers (and Master Handweaver Edna Burchard) once I have enough information. Naming her after Edna seemed very fitting.
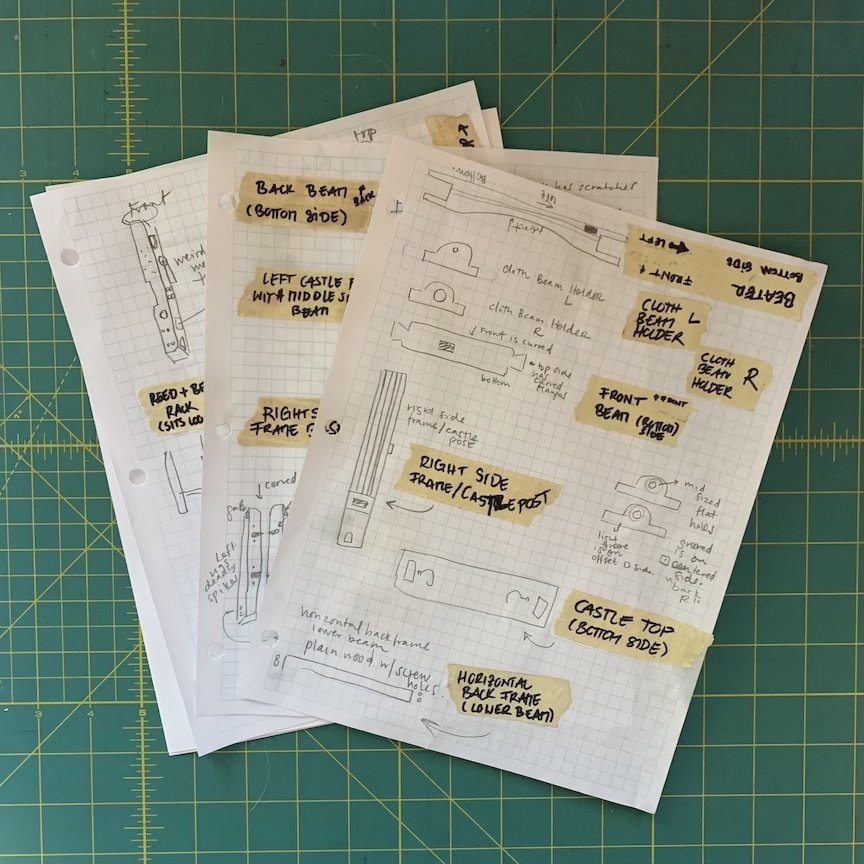
The loom came to me disassembled -- but in the most meticulous way. Every piece was labeled with masking tape. All the screws, bolts, and fasteners were sealed in labeled envelopes. And the previous owner even typed up instructions for how she recommends reassembling it. Weavers are the best people. It's clear this beauty was well loved.
Edna requires a bit of work before she's ready to weave. So far, I added an additional coat of wax to all the pieces -- the previous owner had started the job with Howard's Feed and Wax so I continued with the same. It was stressful removing the labels from the pieces... but I drew annotated pictures of each piece for myself so I could match everything up again after the finishing was complete.

For the metal parts, I soaked what hardware I could in vinegar and polished and removed rust using super fine steel wool and WD-40.
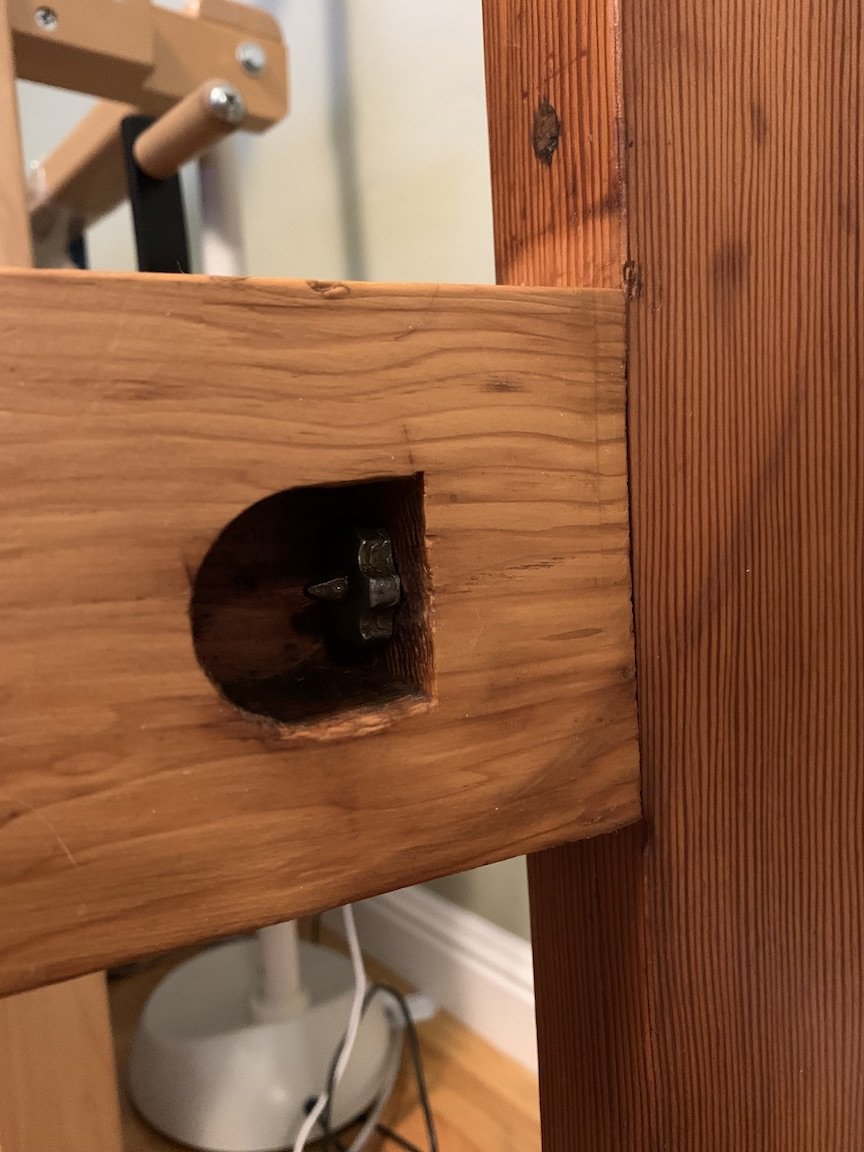
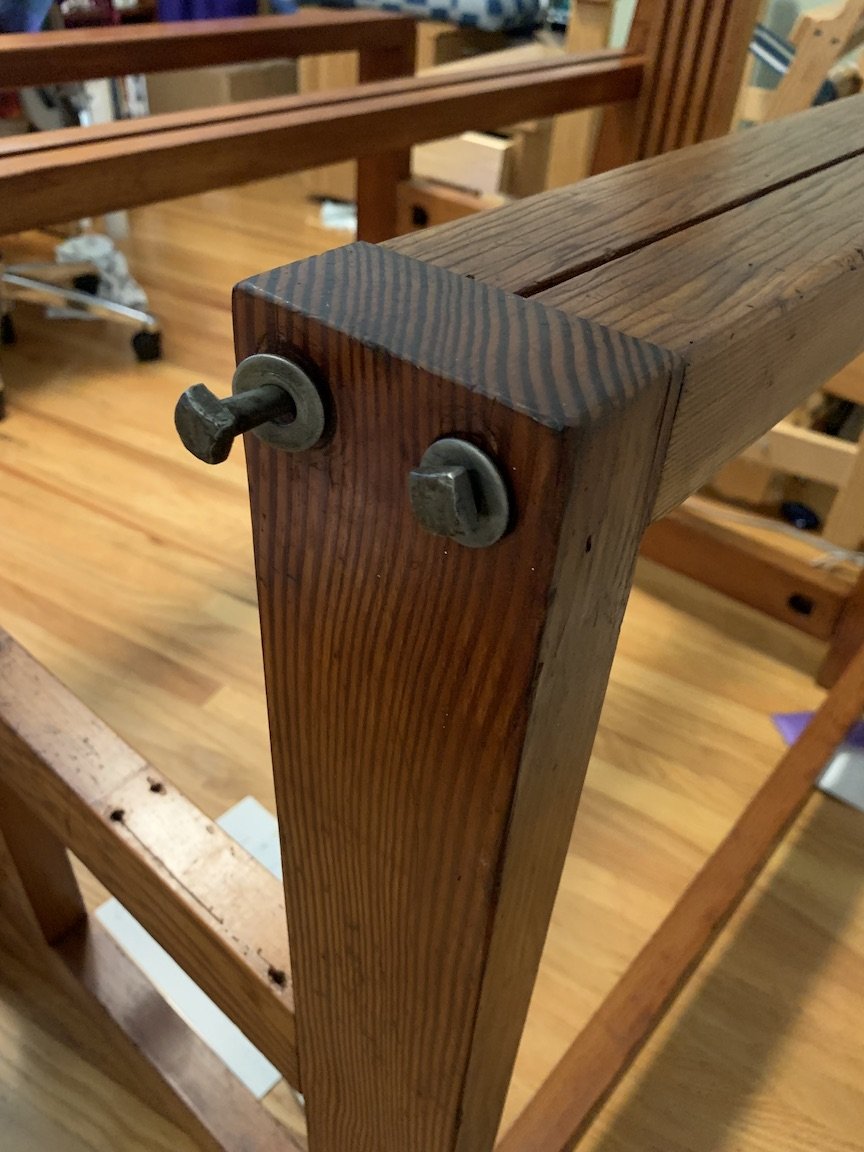
The frame pieces were finally ready to assemble today! The front-to-back connections have bolts with nuts that allow for easy disassembly and reassembly. The side-to-side pieces either rest on the loom (like the castle top and beater bar) or are screwed together directly into the wood. Unfortunately, some of the wood holes are stripped, so the lag bolts (hey, I learned a new term!) slide right in to the frame without grabbing any wood.
I polled a woodworkers group at my work for advice. They recommended two courses of action:
Drill additional holes and convert this setup into nuts and bolts (instead of lag bolts that screw directly into the wood)
Plug the hole with a close fitting dowel and wood glue, drill a new pilot hole, then screw in the lag bolt
#1 makes me anxious because I don't want to drill large holes in the frame. Plus, this loom isn't something that needs to be disassembled and reassembled often. (And actually, I think it could be transported in an SUV or even my little hatchback by only disassembling the existing nuts/bolts and leaving the wood-screwed pieces alone.) So I'm going with #2. And I'll investigate getting new lag bolts as well. Look at me, moonlighting as a woodworker. :)
Here is Edna's partially assembled frame next to my Gilmore (which doesn't have an official name! something I need to remedy). They are roughly the same size; Edna is less wide but has a squarer base so she has a larger footprint overall.

My to-do list is as follows:
Give the wood a once over with wax
Clean up the metal hardware
Fix the lag bolts situation
Clean up the shafts: This includes waxing and de-rusting (and possible replacing heddles, maybe with texsolv?)
Clean up the cloth beam: I would love to finish the wood in some way, but that would require removing the apron and reattaching it later on
Re-set up the yarn attachment points on the sectional beam, which I disassembled to add wax
De-rust the pulleys and replace the cord with texsolv if possible
Connect the lams and treadles, again aiming for texsolv
Phew! That's a lot when you write it all out. I set myself a goal to get her up and running the the end of May, but that might be ambitious. We'll see!