Setting up my Burchard Weavers counterbalance loom, part 2
I made so much progress over the past few weeks. Edna is ready for a warp! 😍

Here's my to-do from a few weeks ago and how I tackled each part.
Fix the lag bolts situation
This part was super new and stressful for me — but ended up working out fantastically, thanks to some advice from woodworkers.
I drilled out the stripped holes to make sure they were even and clear. Then, I inserted dowels coated in wood glue. After ~24 hours, I trimmed the excess dowel, drilled pilot holes, and assembled the horizontal beams using shiny new lag bolts. So much better.

Clean up the shafts
I put feed and wax on the frames and de-rusted the heddle bars. I removed the chains that connected the shafts to the lams, soaked them in vinegar, and scrubbed off the rust with fine steel wool. They look beautiful now!
I also replaced the old flat metal heddles with texsolv (237/12). Edna and the Gilmore are heddle buddies so they can swap as needed.
Clean up the cloth beam
The beam wood is dry and in need of some love... but the apron is stapled on and is in excellent condition. I decided to leave the wood as-is for the time being. However, I did clean up the metal gear.
The screws for this part were a complete mashup of styles and ages, so I replaced them.

Attach the sectional beam
I screwed the sectional beam to the back of the loom. It's a work of art!
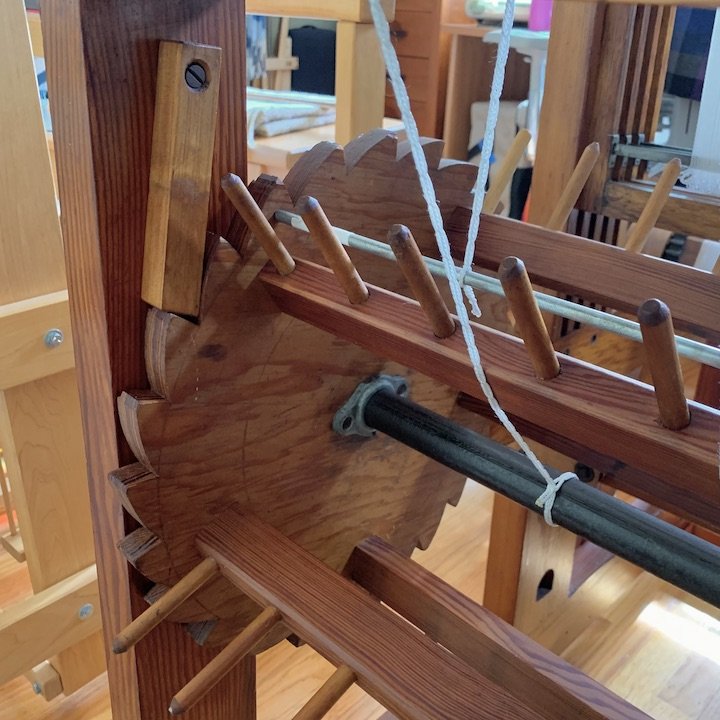
One thing of note: the beam is so large, it covers up the nuts/bolts that allow for easy disassembly of the loom. I don't think I can disassemble the loom again without unscrewing the beam holders. Not ideal since they go directly into the wood.
I attached the metal rod to the sectional beam with texsolv cord. I'm new to sectional beams and unattached rods so I'll have to see how this works out.
Attach the pulleys
I thought the pulleys were metal and rusty... but they actually are made of some rigid, non-metal material with a woven-look. Really interesting. They seem in good condition.

I replaced the string cords with texsolv. The warp path passes though the center of each heddle eye which is a good start, and I took my best guess at the relative lengths of the cables (from the top pulley to the bottom pulleys, and the from bottom pulleys to the shafts). I may have to adjust these once I start weaving.

Connect the lams and treadles
As noted above, the shafts are attached to the lams with metal chains. However, when assembled, I had to remove two chain links to get the lams to lay approximately parallel to the ground in neutral position.
Since there were no treadle cords, I used texsolv and guessed at the length. I may have to adjust these as well once I start weaving, but the lams don't seem to hit the treadles which is a good start.

What's left?
I'm sure I'll need to realign some of the elements once I start weaving. So next step is to add a test warp.
I also have two reeds that need de-rusting. I think they are salvageable (light rust, seemingly no pitting). That will be a weekend project with naval jelly.